
Organizing for Kids: Systems That Grow With Them
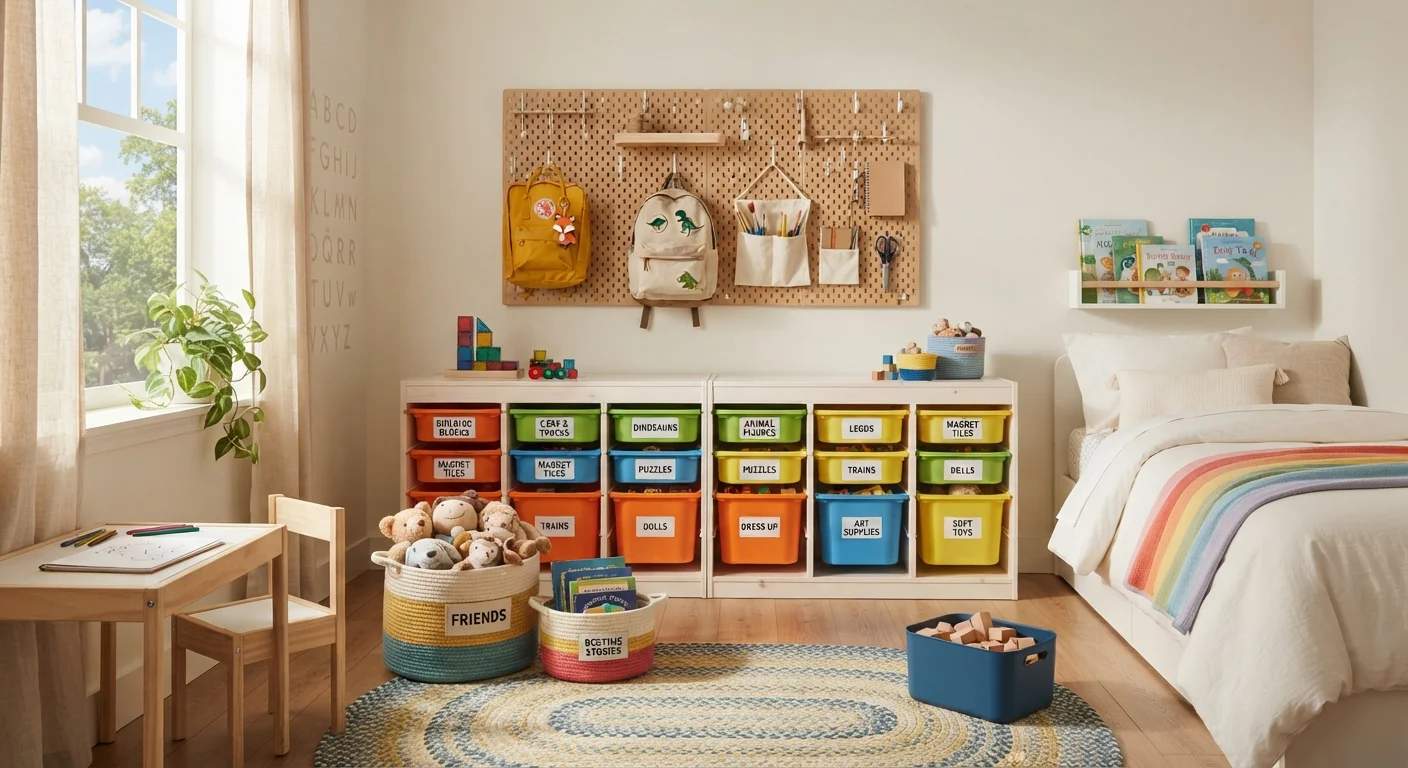
Photo credit: TrendingFaqs.com
Children's stuff expands fast and changes constantly. Learn how to build flexible organization systems that actually hold up.
Key Takeaways
- Zone-based storage beats single catch-all spaces because kids learn to return items to a category.
- Systems that require adult intervention to use will not be maintained by children; design for independence.
- Reassess every season or school year, since children's needs change faster than most household storage.
- Labels with pictures alongside words help pre-readers use the system on their own.
- Decluttering before organizing prevents a new system from filling up with things that no longer belong.
Why most children's storage fails
The most common reason children's organization systems fall apart is that they were designed for adults to maintain. A system with small compartments, lidded containers, or abstract categories might look orderly, but if a child cannot use it without help, cleanup will always require a parent present. That is not sustainable past age three or four.
A second failure point is building a system around the current volume of stuff without accounting for how quickly that volume changes. Birthday gifts, school supplies, and hobby equipment arrive steadily. Without a mechanism for editing what comes in, any storage solution fills up. Read the core principles of home organization before buying anything, especially the section on designated spots.
A third problem is complexity. A system with twelve labeled micro-categories sounds thorough, but a tired seven-year-old doing cleanup at bedtime will not sort marbles from small plastic animals. Fewer categories with slightly broader definitions outperform detailed systems in real daily use. For more on this pattern, see organization mistakes that backfire.
Involve children in the setup
When children help choose the containers and decide where categories live, they are more likely to use the system. Let them test whether they can reach each shelf and open each bin without help. If they struggle during setup, they will abandon it during cleanup.
How to build and maintain the system
Declutter before you buy anything
Buying bins and shelves before sorting what you actually own is one of the most common organization mistakes. You may end up storing items the child has outgrown, and the new containers may not fit what remains. Sort first, measure second, purchase last.
Open-front bins or baskets
Allow children to drop items in and grab them out without dealing with lids, which reduces friction and increases use.
Label maker or printed picture labels
Identify each storage zone so children know where items belong without asking an adult.
Low bookshelf or cube storage unit
Positions storage at child height so children can access and return things independently.
Clear lidded bins
Store seasonal or less-used items while keeping contents visible to reduce digging.
Pegboard with hooks
Provides wall-mounted storage for backpacks, costumes, and frequently used items without taking up floor space.
Donation box or bag
Keeps the decluttering step concrete and immediate rather than theoretical.
Sort everything before touching storage
Pull every item out of the space you are organizing. Group things into broad categories: books, art supplies, building toys, stuffed animals, dress-up, games with pieces, and so on. At the same time, set aside anything the child has outgrown, has duplicates of, or no longer uses. A donation box in the room makes this concrete.
Do not skip this step. Building a system around clutter means the system will be full on day one and harder to maintain than what you started with.
Define zones based on how the child actually uses the space
A zone is a physical area dedicated to one type of activity or category. Common zones in a child's room include: reading corner, art and craft area, active play (blocks, building sets), quiet play (puzzles, small figures), and sleep area. Zones do not need walls or dividers; consistent location is enough.
Place zones where they make sense to the child. Art supplies near the desk, books near the reading chair, frequently grabbed toys at the lowest shelf level. If a zone does not match how the child naturally moves through the room, it will not hold.
Choose containers that fit the child's ability right now
Open-front bins are the most maintainable option for children under ten. Lids require two hands, fine motor control, and patience, which most children abandon during cleanup. Choose containers sized to the category: a small bin for crayons, a larger basket for stuffed animals.
Buy containers only after you have sorted and know what volume you are storing. Buying in advance often produces containers that are too small, too large, or too many. Measure the shelf or space first.
Label every container with both words and pictures
Picture labels matter for children who are not yet reading independently. Print or draw a simple image of the contents alongside the word. Tape it to the front of the bin at the child's eye level. Even children who can read benefit from picture labels because they register faster during cleanup when attention is already low.
Use a consistent label style throughout the space. Mismatched labels from different systems are harder to scan quickly.
Set a seasonal review date and actually keep it
Children's needs shift with age, school year, and interests. A system built for a four-year-old will not serve a six-year-old well. Set a calendar reminder at the start of each new school year and each summer to reassess. At each review: remove items outgrown or unused, adjust zone sizes if a category has grown or shrunk, and update labels if the child's reading level has changed.
This review does not need to be a full overhaul. Often moving one bin and replacing two labels is enough to keep the system functional for another season. See our seasonal storage guide for a related approach to rotating what stays accessible.
Once the system is in place, the maintenance question is whether the child can complete cleanup without prompting through each step. Watch them clean up once without helping. Where they pause, get confused, or dump instead of sort, the system needs adjustment, not the child. That is design feedback, and adjusting is faster than repeated correction.
Children sharing a room add a layer of complexity. Separate zones for each child, even if they share some categories, reduces conflict and confusion. See our shared storage guide for approaches that work when multiple people use the same space.

Author
Home Editorial Team
Home Editorial Team is the collective byline for our editorial team and contributor network. Articles published under this byline or an editorial pen name are researched, written, and reviewed according to our editorial standards for clarity, consistency, and independence before publication.
View all articles →